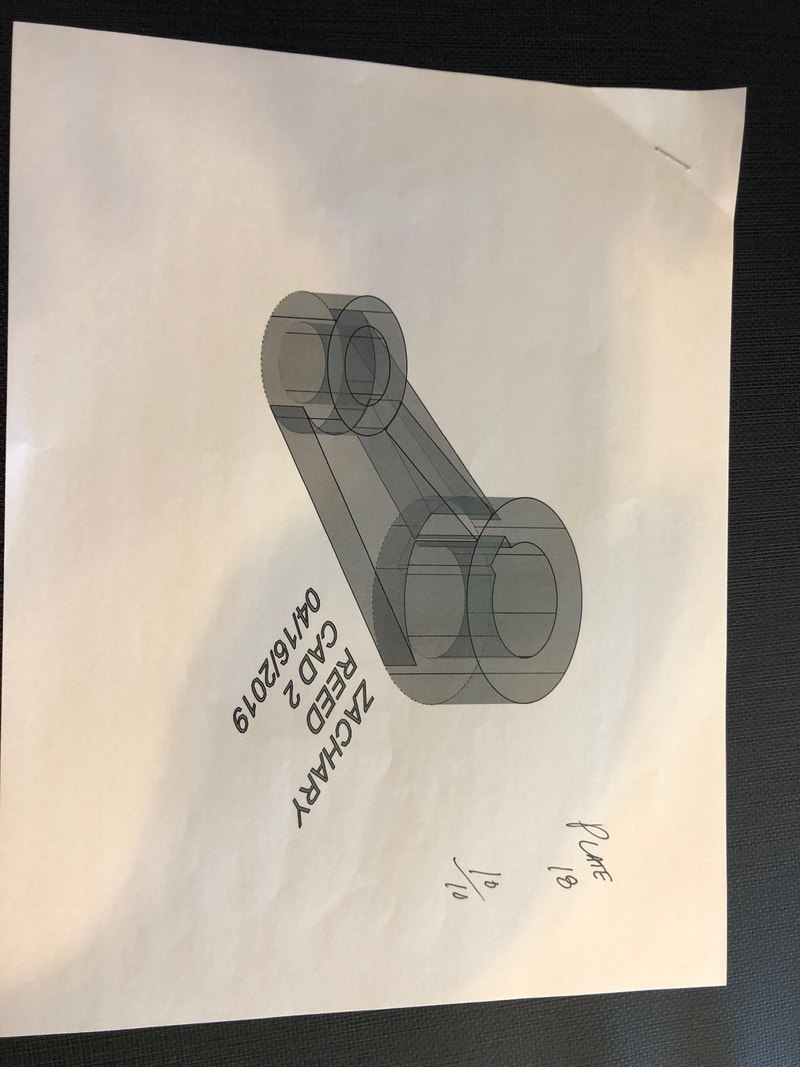
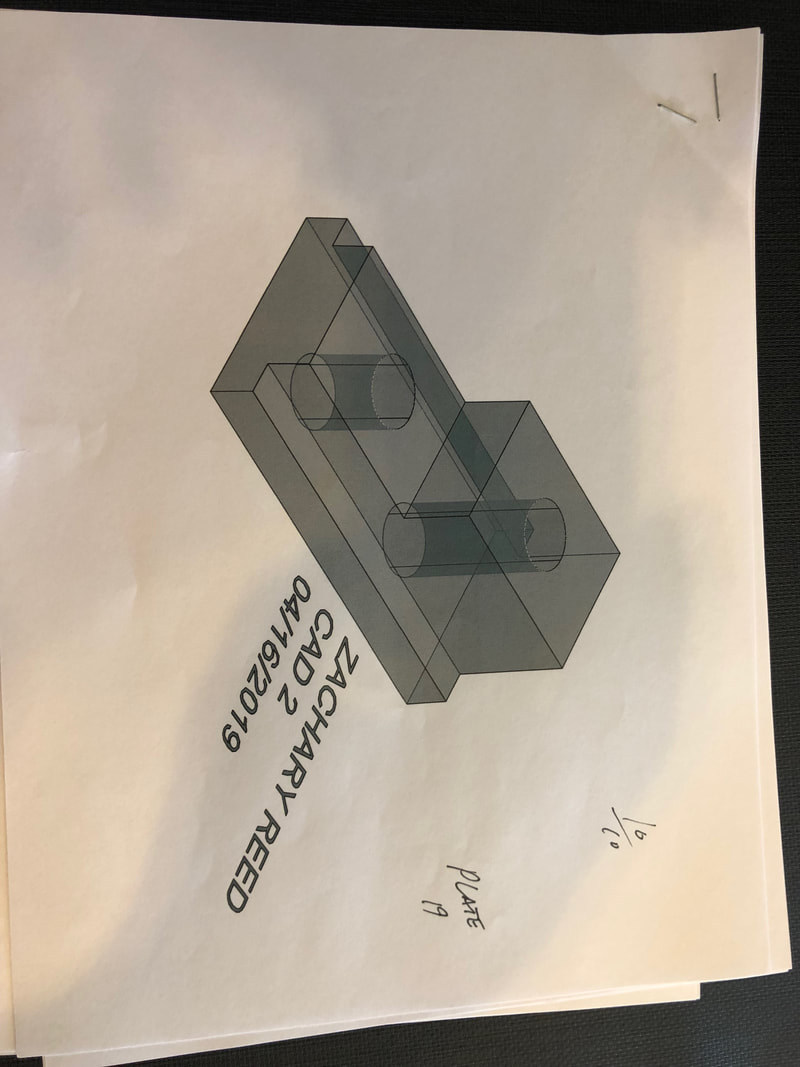
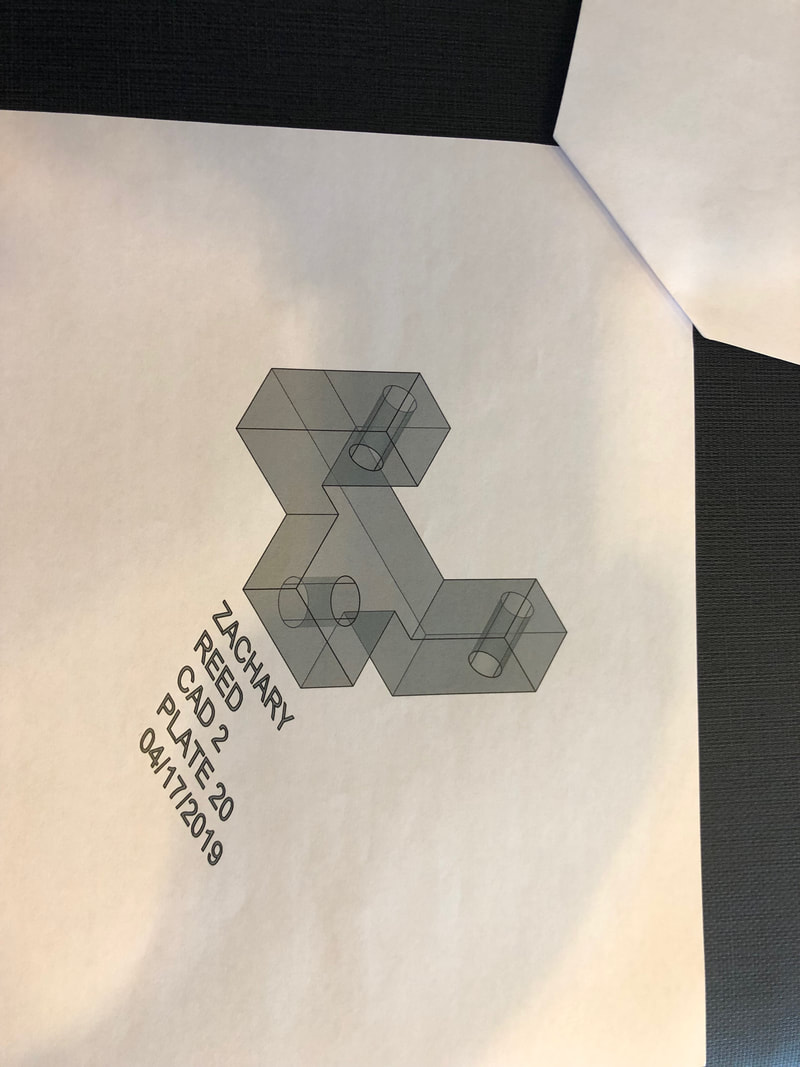
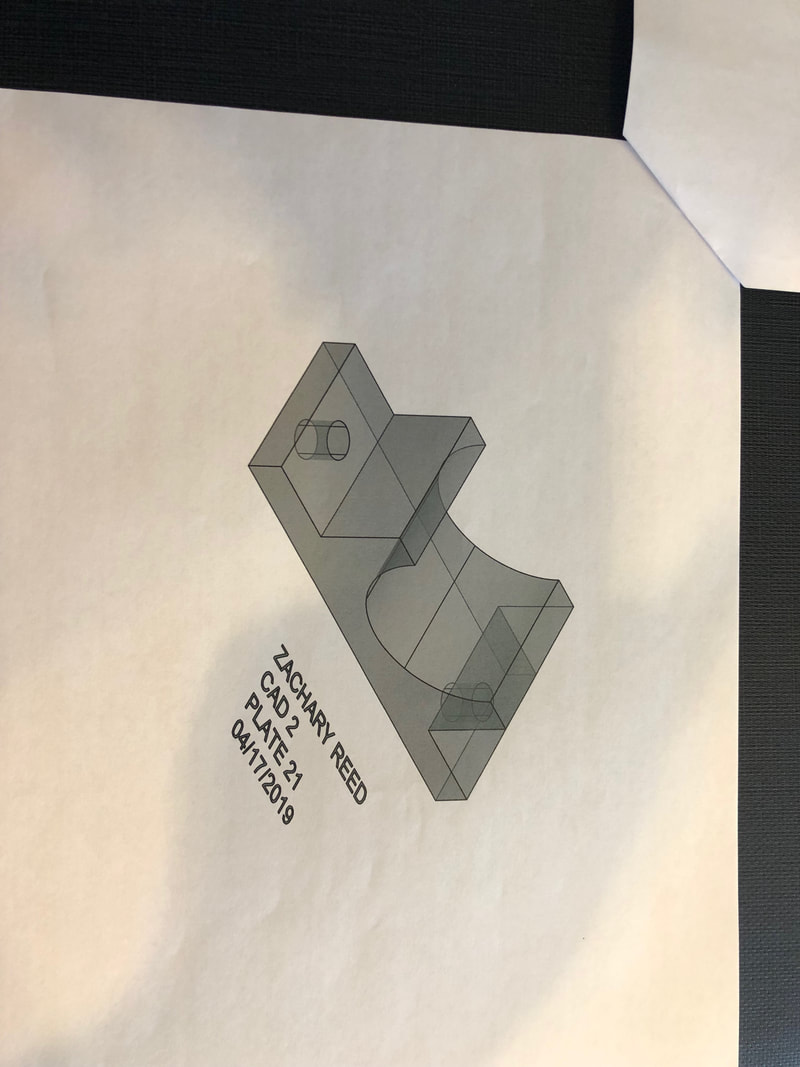
This drawing are made using autoCAD 3-D mode. They are challenging because you have to figure out when to use the different faces of the object and when you can just continue to build on top of your already constructed object. If you did these in the wrong order you wold end up with large going over the object like they are two pieces rather than one smooth continuous piece. The drawing that we made had to be printed regular as seen from that angle and in a X-ray mode to show that all of the lines and cut out where there even if you can't see them with the angle.
|
|
This is plate 18 this was the first drawing that we did in autoCAD 3-D. To build this shape we first made the bottom layer and then drew circles on it. Next, we used the push/pull tool to bring the circles into 3-D. Finally, we made the center connecting rib by first drawing it off to the side and then moving onto the shape.
|
|
This is plate 19 to make this we mad to first start by making the bottom layer, and then push/pull the other flat surfaces out of the bottom. Finally, you have to make the circles of the flat surfaces and push/pull them down through the object to show the cut out on the object.
|
|
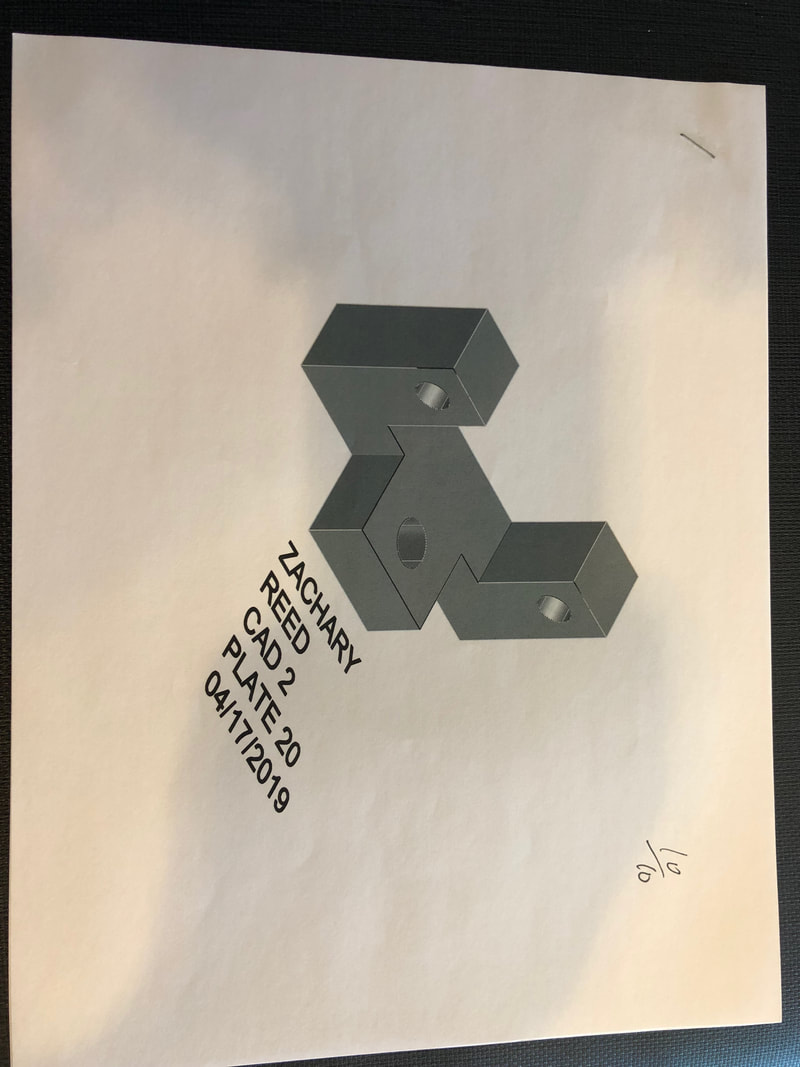
This is plate 20 To draw this you had to first make the bottom payer, and then make the left side and use the push/pull tool to make the side. Next, you would copy the left side and move another one over to the right side. Finally, you should use the union tool to make the shapes look like they are one.
|
|
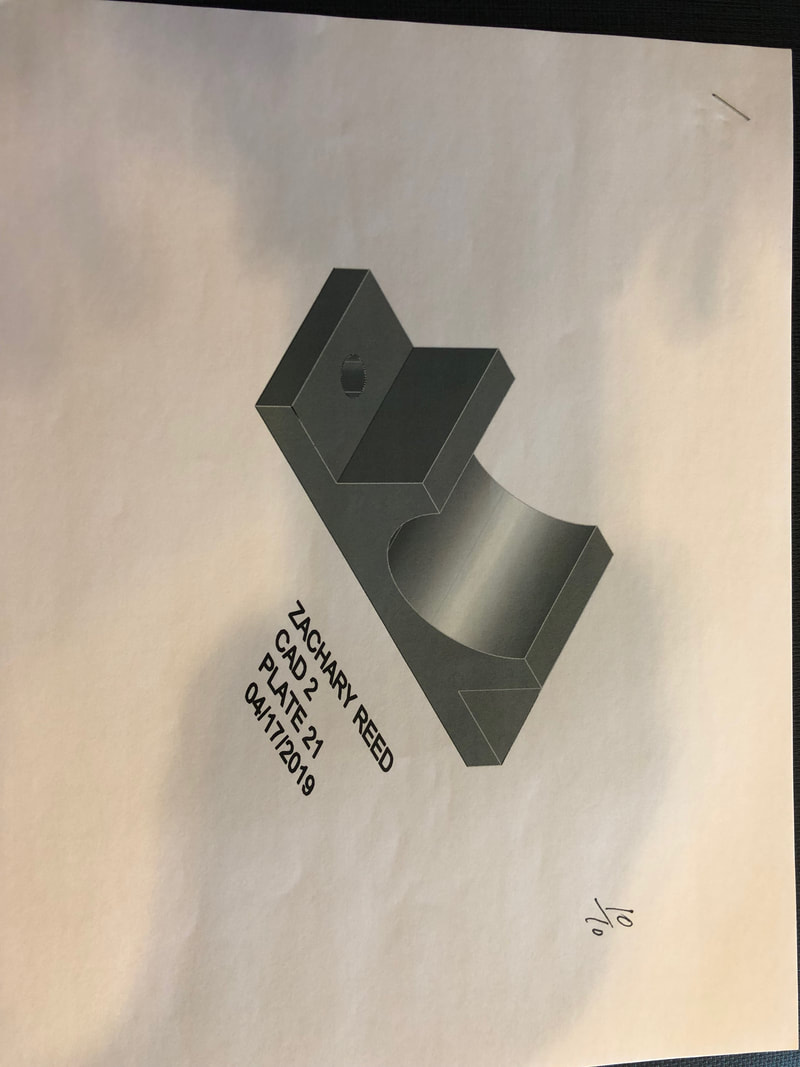
This is plate 21 to draw this you had to first make the bottom layer, and then draw the circles on either side and use the push/pull tool to make the cut outs on the object. Next, make the pillars and finally, use the revolve tool to make the half pipe object.
|
|
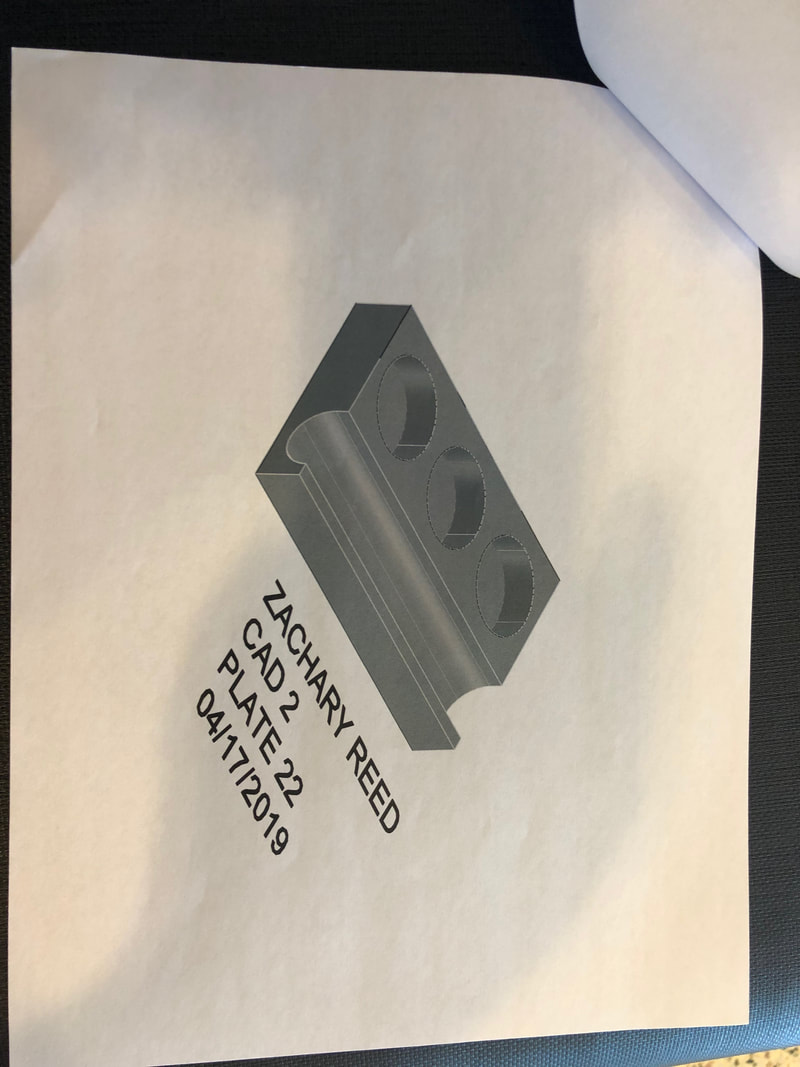
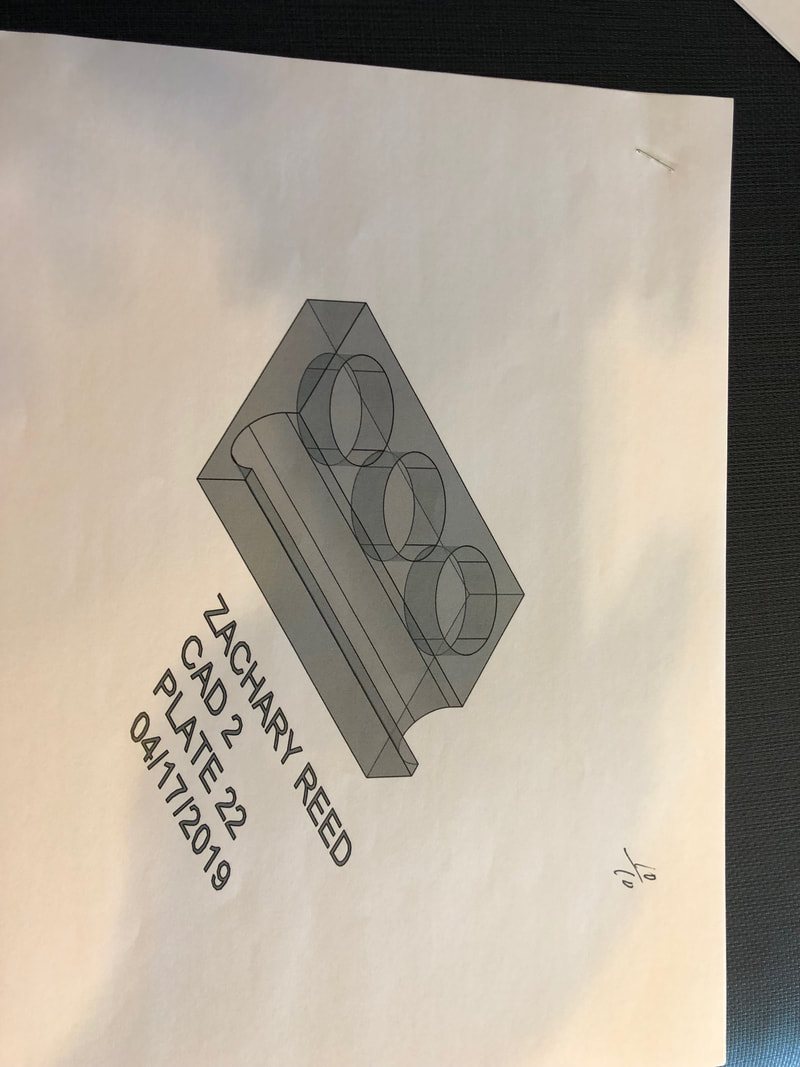
This is plate 22 and to draw it you have to make the bottom layer, and then draw the another layer on top of that and push/pull it into 3-D. Next, you should make the circles on top of the object and push/pull them the printed lengths. Finally, you should us the union tool to make the object look like one shape rather than two.

|
|
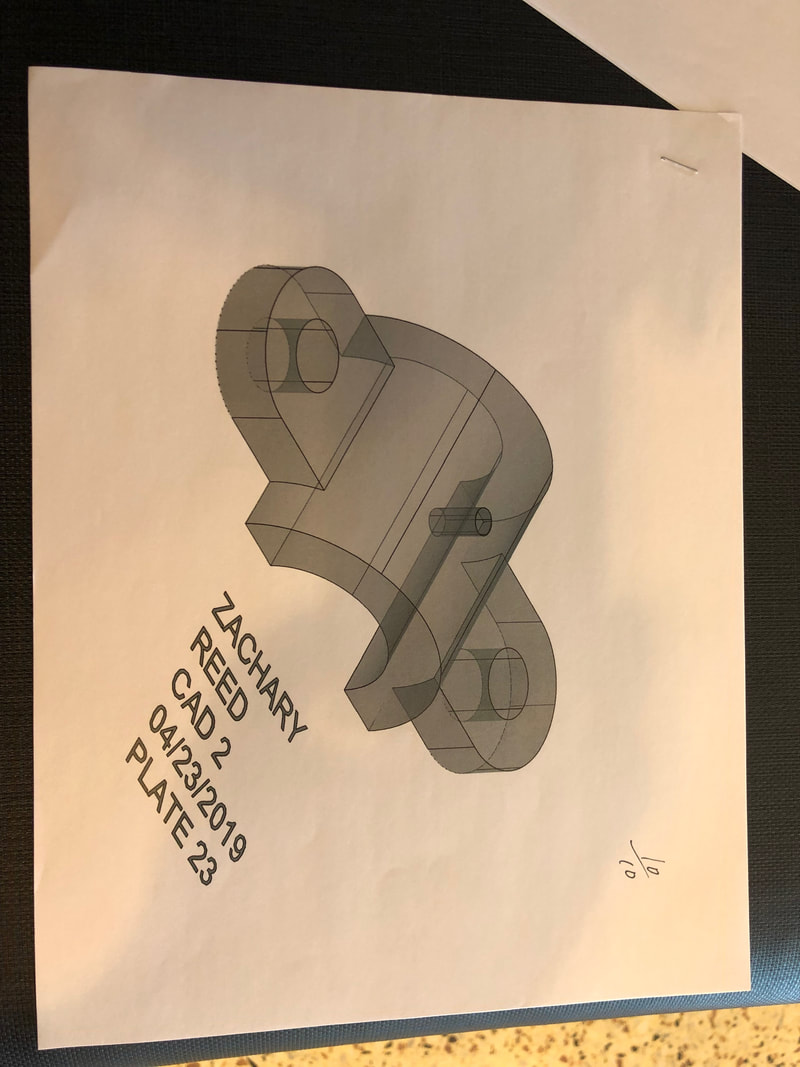
This is plate 23 to draw this you have to first make the base layer, and then draw the circles and use the push/pull tool to make the cut outs on the object. Next, use the revolve tool to make the arc. Finally, draw a circle on top of the arc and use the push/pull tool to make a cut out in the object.
|
|
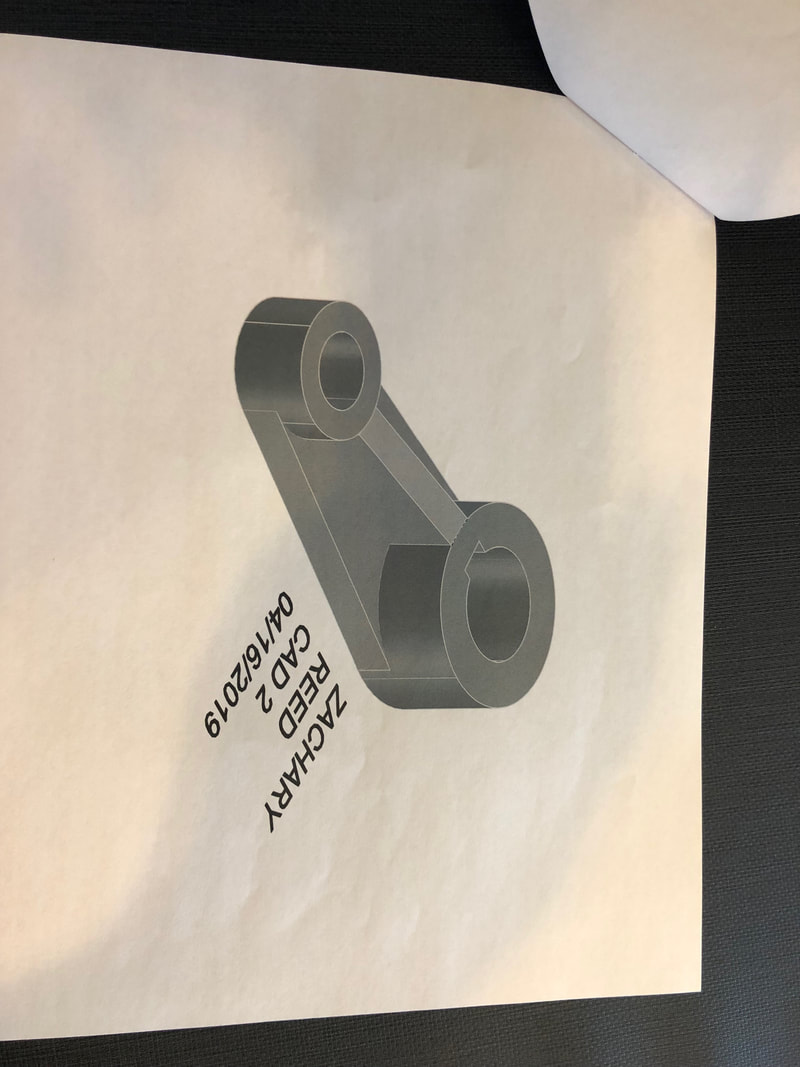
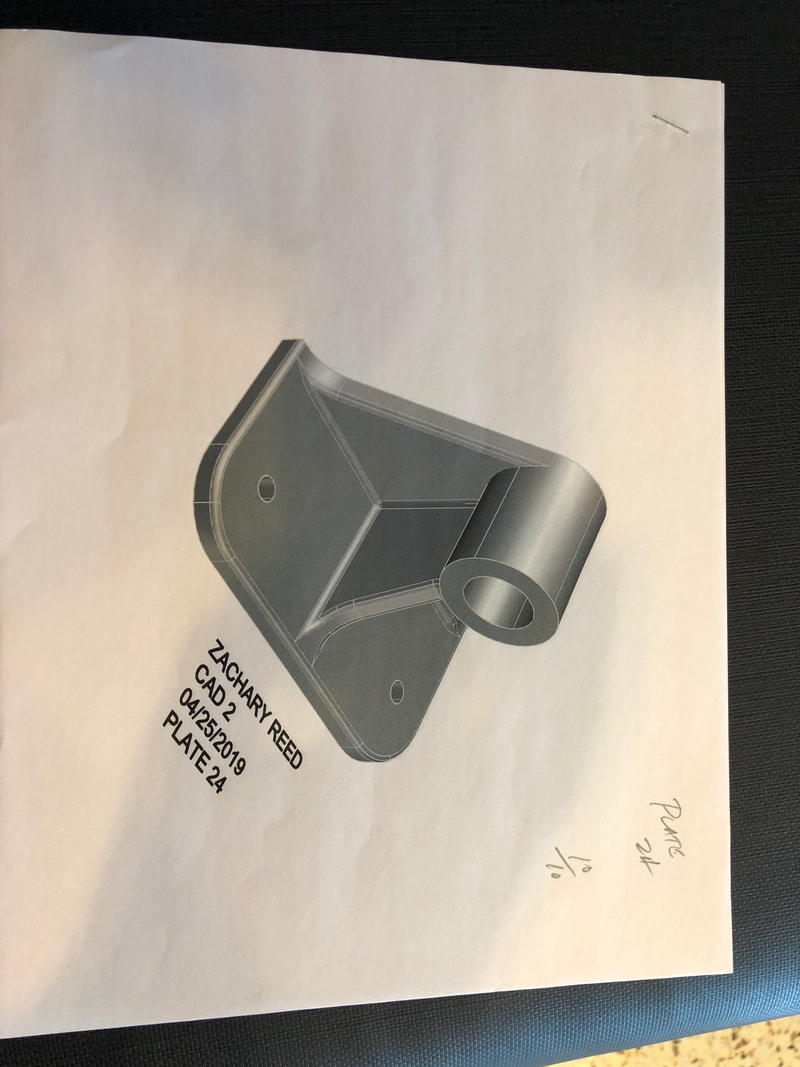
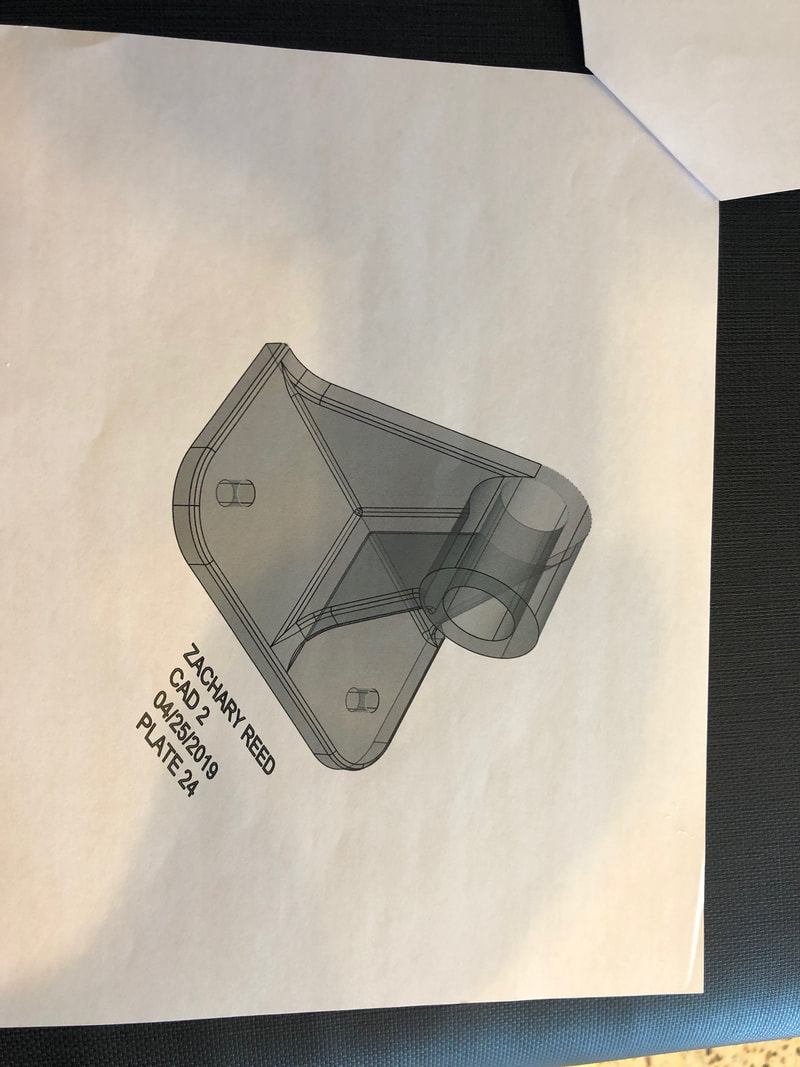
This is plate 24 to draw this you have to start with the base layer, and then draw the back of the object and move it on top of the object. Next, you need to make the rib and move into the object. After that, you have to make the top drum and move it into the back. Finally, you have to round the corners and union the object to make it look like one rather than two different objects.
|
|
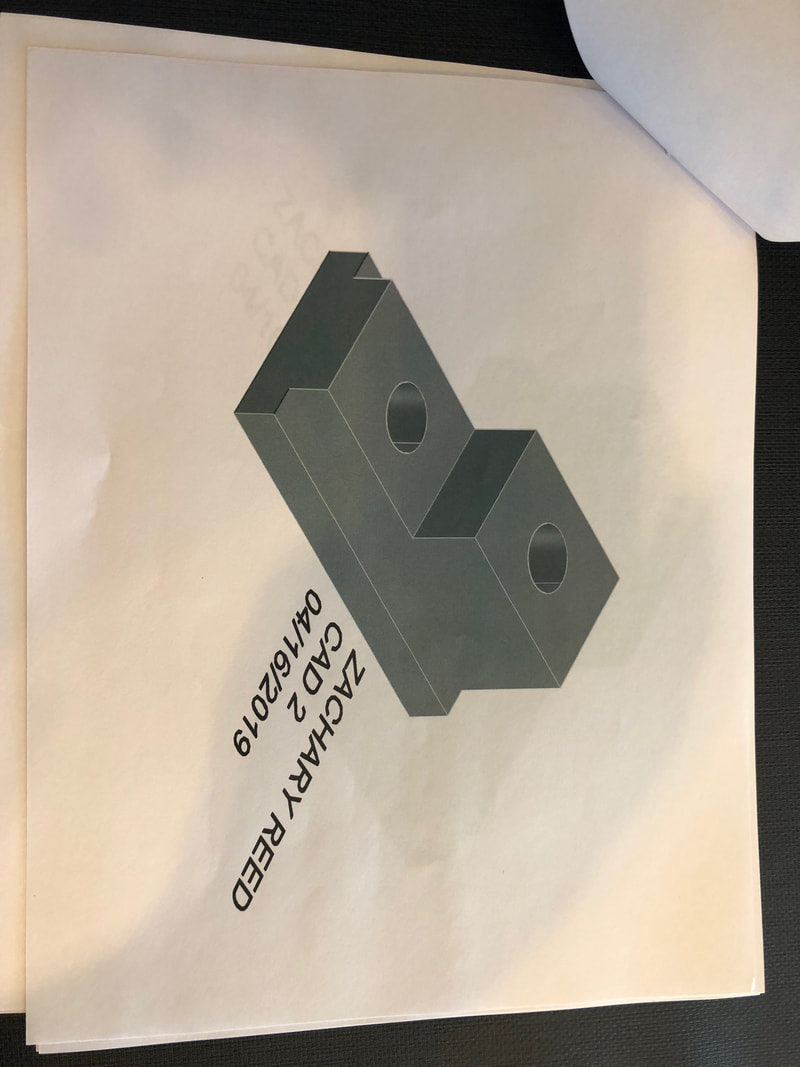
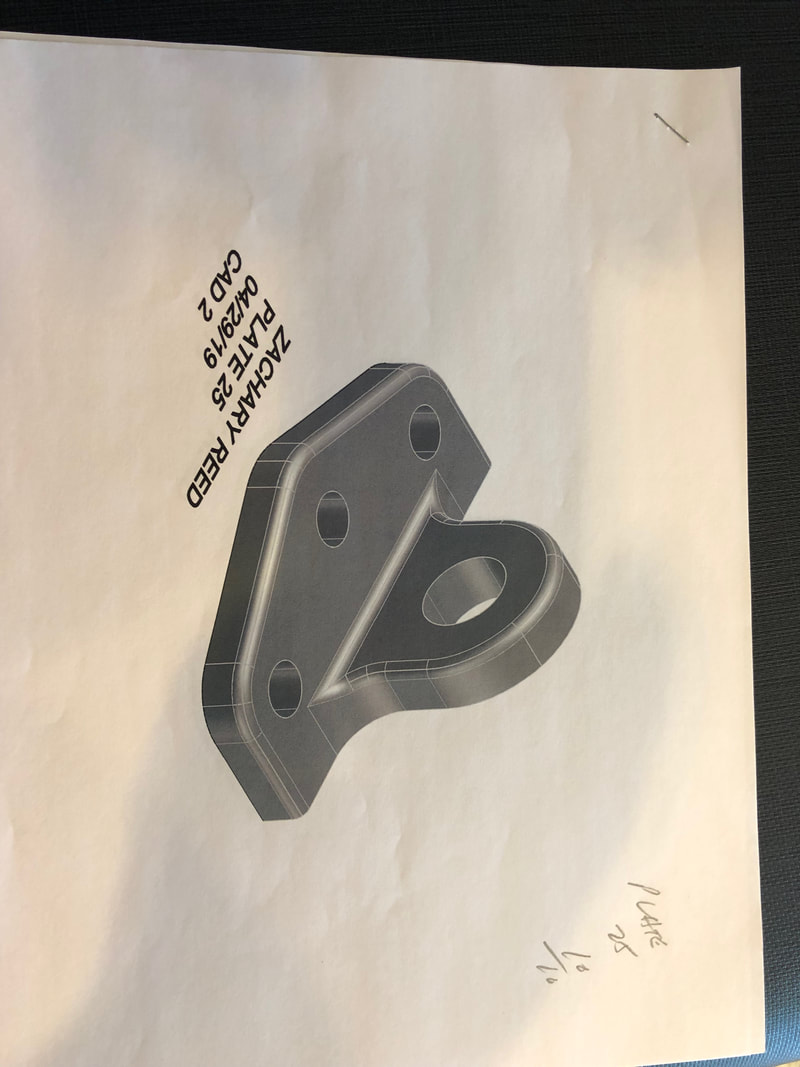
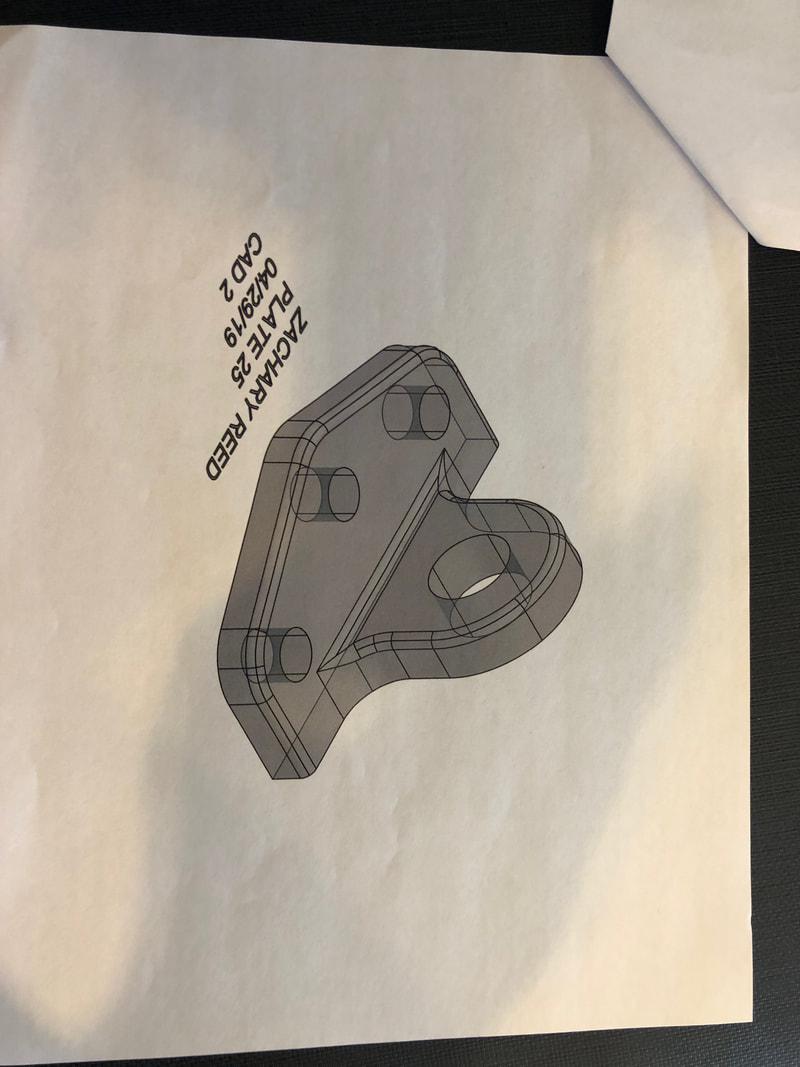
This is plate 25 you draw this be first starting with the base layer , and then draw the circles on top of the bottom layer and then use the push/pull tool to make a cut out in the object. Next, you have to make the back and then move the back on top of the bottom piece. Finally, you have to round and union the object together so that the shape is one rather than two.
